
UV Curing System
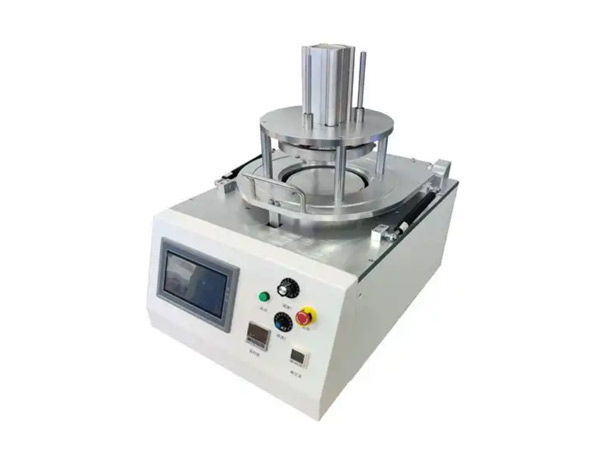
Detailed introduction
| General Specifications | |
|---|---|
| Overall Dimensions (L×W×H) | 600 × 500 × 900 mm |
| Power Supply | AC 220 V, 50–60 Hz |
| Power Consumption | 1.0 kW |
| Air Pressure | 0.5 ~ 0.7 MPa |
| Control System | PLC + Touch Screen (HMI) |
| Weight | 100 kg |
Key Features
1.Stable structure with high-speed operation. It reduces labor intensity while featuring a simple mechanism that is easy to maintain. Capable of replacing 2–3 operators, this equipment effectively saves production costs for customers.
2.Fully automated production under dedicated software control ensures rapid manufacturing cycles.
I、Installation & Commissioning
1、Install the equipment indoors in a dry, well-ventilated area.
2、The operating environment temperature should be maintained between 10–35°C.
3、The operating environment humidity should be maintained between 5–35% RH.
4、This equipment operates on AC 220 V, 50–60 Hz. Ensure the power outlet is properly grounded.
5、After installation, carefully inspect all bolts to ensure they are tightened. Remove any debris from the machine. Do not power on until the machine is confirmed clean and secure.
6、During commissioning, verify the power status of the machine to ensure personnel safety.
II、Wafer Expander Operation Manual
2.1 Machine Structure
Responsibilities
-
Production operators shall follow this operational standard and procedure to regulate actions and provide guidance.
-
Maintenance personnel shall perform periodic upkeep according to this operational regulation.
Safety Requirements
-
Operators must pass training and assessment before operating the machine.
-
In case of abnormal noise or malfunction symptoms, immediately press the Emergency Stop button, cut off power, and contact maintenance.
-
Keep hands clear of the heating platen, vertical cylinders, and electrical components (e.g., ionizers) during machine operation.
-
Never place any objects (e.g., jigs, expanded products) into the machine during Servo Homing.
-
Ensure power is completely disconnected before performing any maintenance.
-
Always turn off the power supply before cleaning the machine.
2.3 Operating Procedure
1) Startup Preparation
-
Air Supply & Temperature: Turn on the compressed air switch and set the pressure parameters according to process standards.
-
Process Parameters: Set air pressure to 0.5–0.7 MPa. Do not operate below 0.4 MPa.
-
Routine Inspection: Operators shall periodically inspect all moving parts to ensure no metal strips or debris are present. If found, stop the machine immediately and clear the obstruction.
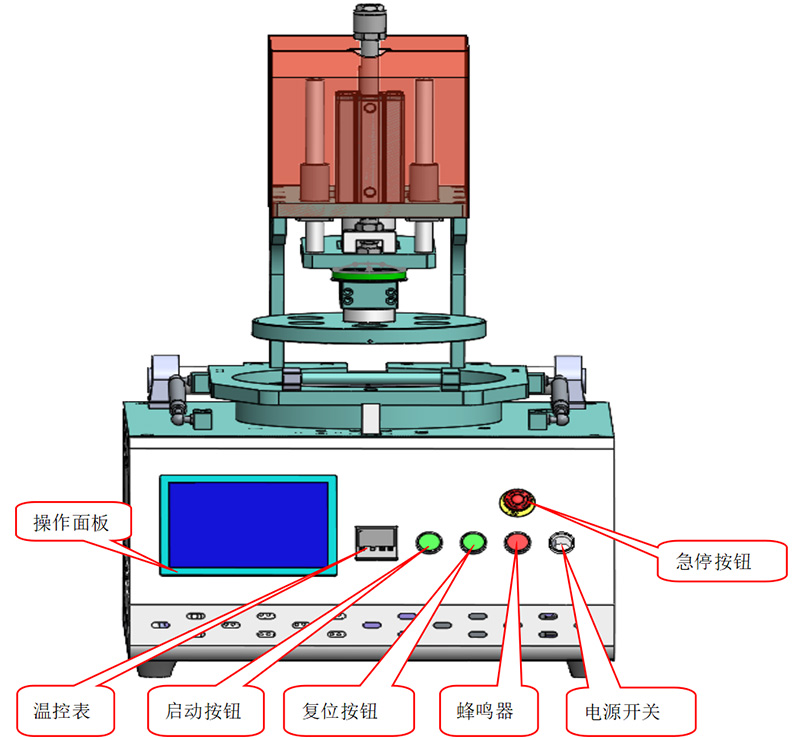
2.4 Control Panel & Button Functions
|
ID |
Component |
Function Description |
|---|---|---|
|
A |
HMI (Touch Screen) |
Human-Machine Interface for monitoring and control. |
|
B |
Power Switch |
Turns the main power supply ON or OFF. |
|
C |
Start Button |
Initiates automatic cycle operation. |
|
D |
Reset Button |
Resets the system to manual mode (or manual state) and clears alarms. |
|
E |
Emergency Stop |
Immediately halts all machine motion (Category 0 Stop). |
|
F |
Temperature Controller |
Sets and displays the heating temperature. |
|
G |
Buzzer |
Audible alarm for faults or cycle completion. |
III. Touch Screen Interface Operation
The touch screen HMI utilizes advanced touch-control technology. Its user-friendly interface and intuitive controls revolutionize daily operations for the end-user. Function keys employ universally recognized graphical icons—a universal language understandable by global users. Users can simply touch the screen with a finger or stylus to execute commands.
Interface Functions are as follows:
3.1 Startup Page

1. Tap the center button to enter the Operation Interface.
3.2 Auto Screen
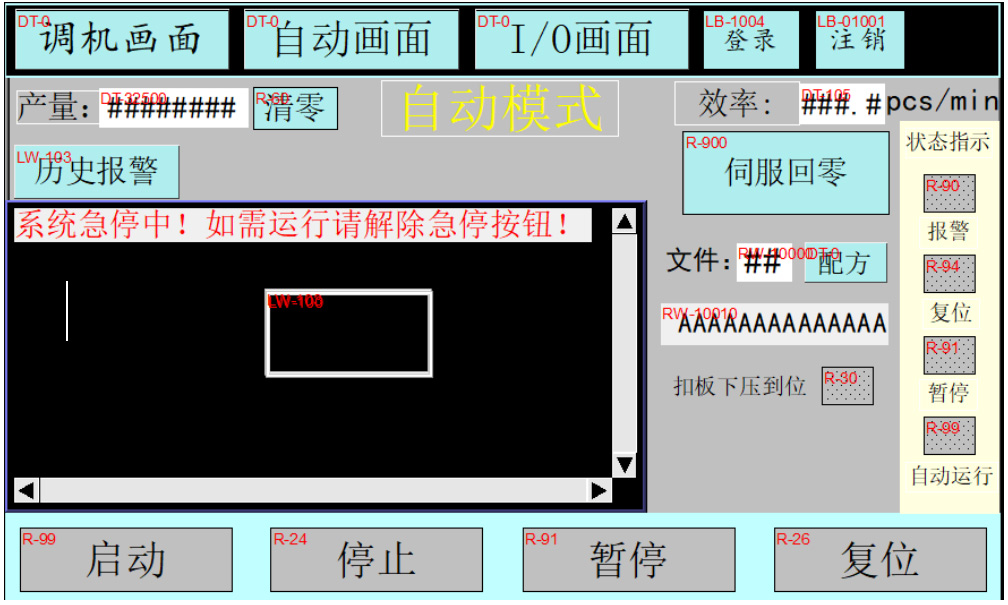
Main Screen Functions
-
View alarm information, machine output count, and perform reset/clear functions.
-
Select the current machine operating mode (Manual/Auto).
-
Indicates "Servo Homing Complete" status or waits for homing operation.
-
Navigation buttons to access all sub-pages (screens).
Production Workflow
When starting production, navigate to the Auto Screen. Upon each startup, the machine must perform Servo Homing. Once homing is complete, load the alphabet ring, followed by the film fixture. Finally, close and lock the upper compression cover. After these steps are confirmed, tap the "Start" button on the touch screen to activate Auto mode. Ensuring safety conditions are met, press the green "Start" button (located on the right side of the screen) to begin production.
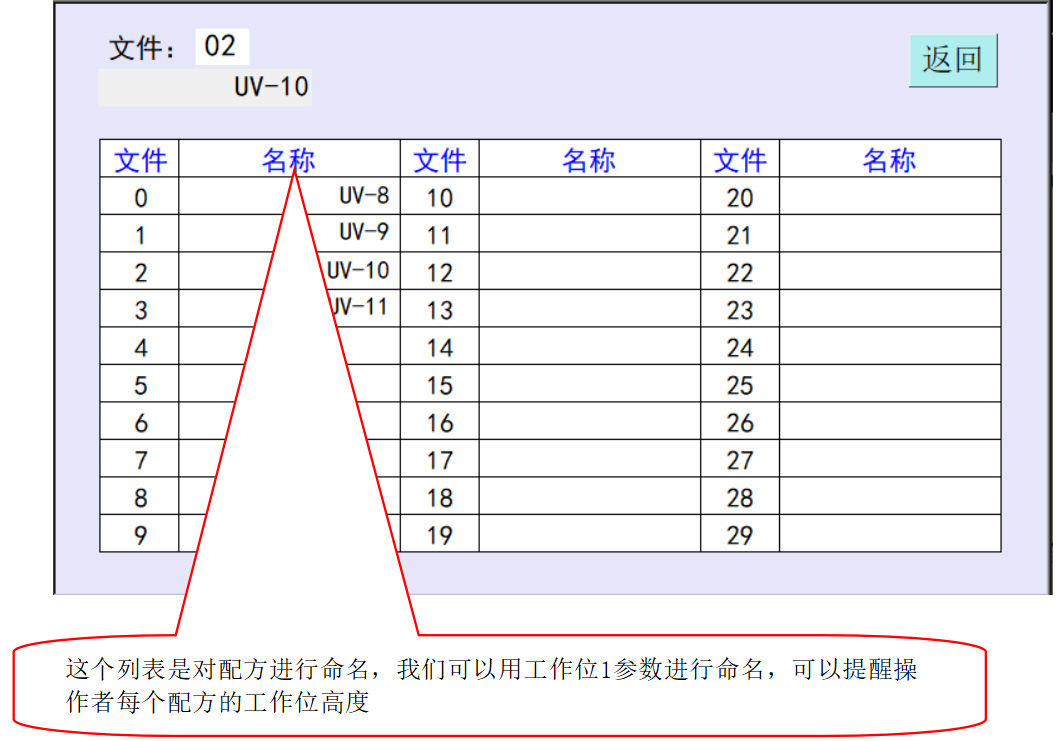
Auto Screen — Recipe Explanation
When producing products of different specifications, the lift height of the machine table must be adjusted. To minimize or prevent parameter errors, we have added a Recipe function.
Using recipes is straightforward. There are 30 recipes available in total. For example, if there are five products (A, B, C, D, and E), you can assign them to recipes 0 through 4 respectively (0=A, 1=B, etc.). Suppose the lift parameter for Product A is 8. You would call up Recipe 0 and then switch to the Manual/Setup Screen to set the Working Position 1 parameter to 8. Once set, even if you modify Working Position 1 while switched to another recipe, it will not affect Recipe 0. Therefore, whenever you recall Recipe 0, its Working Position 1 parameter will remain 8. Recipes 1–4 are configured in the same manner.
Recipe Screen Access
Tap the "Recipe" button on the Auto Screen to enter the Recipe Screen as shown below.
Operation & Running
-
Connect the air supply and ensure sufficient pressure.
-
Before powering on, ensure the worktable is clear of obstructions and clean.
-
Connect the power supply (AC 220 V, 50–60 Hz) and ensure correct wiring/polarity.
-
Turn on the power switch on the control panel; the Power Indicator Light will illuminate.
-
The machine will perform Servo Homing. It is recommended to wait until the temperature controller reaches 50°C before starting automatic operation.
-
After power-on, press the "Start" button on the HMI's Auto Screen to enable Auto mode. To commence operation, press the physical "Start" button on the control panel. If an issue occurs during operation, press the "Pause" button on the Auto Screen to stop the machine.
Maintenance
-
Regularly lubricate all transmission components.
-
Periodically inspect the sensing switches for proper operation.
-
Regularly inspect power and control cables for damage, and ensure the control cabinet is free of debris and dust.
-
Lubricate guide rods and sliders 1–2 times per day.
-
Clean the machine thoroughly before leaving work. Do not leave any debris on the equipment.
-
Quarterly inspection and re-tightening of bolts and screws on all assemblies.
-
Every six months, clean the transmission components to prevent wear caused by a mixture of dust and oil.
Safety Precautions
-
Keep hands and foreign objects away from transmission components during normal operation to prevent machine damage or personal injury.
-
Do not place any body parts near the transmission components during production to avoid injury.
-
In case of abnormal conditions during operation, immediately turn off the power supply.
-
If any issue cannot be resolved during production, notify qualified maintenance personnel immediately.
-
When the Green Indicator Light is illuminated, the machine is in automatic operation. Observe all safety procedures.